This post title quickly went from being “Calling All Back To School Teachers – Make Your Rocking Chairs Beautiful Again” to “Oh, No! What Have I Done?!”.
I’ve painted on several types of surfaces and used a variety of types of paint over the years. Don’t get me wrong, I make mistakes and need to fix them on the spot or troubleshoot a solution. This time was different though. Chalk paint doesn’t look finished until the wax is applied, so I just kept thinking it would all come together. Spoiler Alert: It didn’t.
1. DON’T paint when it’s too hot and humid - listen to this!
This was the first time I ever tried to video my paint job, and I wanted a pretty background, so I decided to complete the project outside. (As Julia Roberts said in Pretty Woman, “Big mistake – HUGE”!) To be honest, I never liked the idea of painting outside anyway because the wind can blow debris into whatever I’m painting. I should have listened to my gut (or the paint label).
I used Behr's Classic Noir Chalk Paint.
So I took my project outside. Good idea for the sanding (obviously), but I didn’t listen to the warning that chalk paint shouldn’t be used over 90 degrees. It’s always a good idea to look at your brand label for the exact temperature, but in general, paint doesn’t like heat. Painting at too high of temperatures can cause all sorts of problems from peeling and blistering paint to the paint not properly adhering to whatever you are working on (among other things).
I unfortunately didn’t follow these tips, and Pittsburgh’s hot and humid weather caused my first issue: thick and clumpy paint.
I unfortunately didn’t follow these tips, and Pittsburgh’s hot and humid weather caused my first issue: thick and clumpy paint.
I felt the paint was going on thick. I just kept thinking maybe it was just the new brush I was using, and it was going to turn out fine (clearly it didn’t). I eventually realized it was the hot temperatures and tried to take my painting job inside, but the damage was already done! Which leads to my next snowballing issue….
2. DON’T add extra unnecessary paint layers
Unfortunately, painting in the heat made my base coat thick and lumpy in some areas, but somehow, in other areas the paint barely even covered the original color. Because the base coat went on uneven, I had to add more layers for full coverage. The problem with this was that I was simply painting over thick and streaky paint marks, thus making the problem worse. I kept thinking another layer of paint would blend it all together and somehow smooth out the paint. To no avail. Chalk paint is textured to begin with, so adding layers made my brush strokes even more uneven and noticeable.
I scratched a little of the layered paint off just to see how easily I would be able to remove it. It was so thick that it came right off.
Adding too many layers can have implications in the short and long run. The paint can drip, droop, or bubble and then later peel/chip off. Extra thick layers are also more susceptible to natural wear and tear over time.
Sometimes, texture is good depending on the look you are trying to achieve. If you want your piece to look super distressed and worn, then uneven parts may not be a problem (especially if you plan on heavily sanding to distress anyway). In my case, it simply looked like a bad paint job.
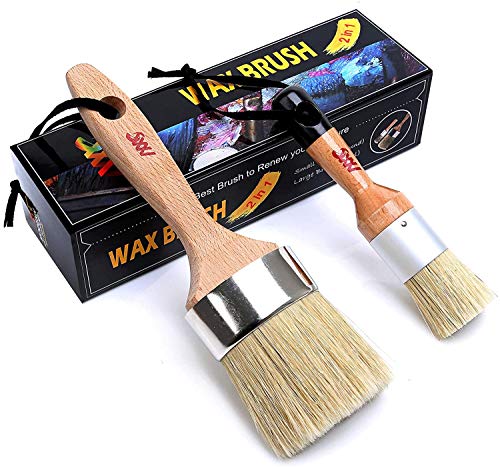
3. DON’T use the wrong paint brushes
I bought a new spindle brush that I love! It works great molding around the spindles and reducing drips. I made the mistake, however, of using this brush on the entire chair. This caused issues, especially on the seat because of the large area I needed to cover. That brush simply doesn’t hold enough paint. After two coats, I could still see the seat’s original color coming through in some places. I decided to switch to my natural bristle chalk paint brush to get better coverage (because chalk paint brushes hold more paint). I felt like I needed to add more paint to cover the large area, but more paint over an already lumpy base coat made for more lumps and bumps. I should have tried my bristle brush from the beginning and maybe I wouldn’t have needed so many extra coats.
Moral of the story: Use the correct brush the first time to avoid unnecessary layers. It’s OK to switch it up and use a larger brush or a roller on larger surfaces, and I should have done that with the seat.
4. DON’T paint in poor lighting
I mean – must I even say this? Apparently, yes. Because I did it. (It’s me, hi, I’m the problem, it’s me.) Because of the hot outside temperatures, I took my painting job inside, but my basement does not have great lighting. I thought I was getting full coverage, but I just simply could not see all of the nooks and crannies. After 3 coats, I went back outside for a “before the wax” picture and, nope!! I needed touch-ups – pronto! Proper lighting is essential when painting anything, but especially furniture where streak marks matter and even coverage is a must.
5. DON’T use the wrong type of paint
I started out wanting to paint this chair two toned (deep brown or blue with a beige seat and antique wax on top) then distress it because, well, it was going into an elementary classroom with 8 year olds who will inevitably add more nicks and natural distressing. My original vision, however, simply wasn’t right for the look of the classroom. A sleek, solid black chair would fit in perfectly with the classroom colors and decor! This is where my mistake happened. I changed the design behind my painting project, but I never changed the type of paint I was planning to use.
Chalk paint can make imperfections look perfect. I love seeing the brush strokes in chalk paint. I love distressing and antiquing chalk paint. Chalk paint lends itself very well to a worn look, which is what I was originally going for.
I kept painting, then sanding, then painting, then sanding: waiting for the finish to be the silky smooth like I was envisioning in my head. But that did not happen. If I wanted a smooth, even look, I should have used a totally different type of paint, like Heirloom Traditions All in One Paint for example, which truly goes on silky smooth.
*Note: You can eliminate (to an extent) or even lessen paint strokes with chalk paint if that is the look you are going for. You can use a roller or flat brush, water your paint down, or finely sand with 220 after applying thin coats (of course allowing them to dry).
6. DON’T store furniture near possible dripping water
Once again, this one is obvious, but I’m just saying to be very mindful where you store your projects. This chair was sitting happily in my garage, dry as a bone, around no water source! However, when I had to leave my house during a rainstorm, the wet garage door leaked out onto my chair as it went up. I hadn’t sealed the chair yet, so the water left marks that did not go away. Luckily it wasn’t a lot, so I lightly sanded it and then when I put on the wax, the marks blended right in. (Wax will make your project a richer, darker color.)


Another brilliant, useful and insightful post!!!!! Well done and the chair looks beautiful. You are amazing!!!!
Thank you so much!!! I truly appreciate your kind comments!🤗
I love this. I have an old rocking chair and had no idea what to do with it.
I may be emailing you with some follow up questions.
I’d love to help you with whatever you need!! Hope to hear from you soon!:)